Start Here
Getting started
On this page
Choose work you already understand well enough to judge. Your first result should show how an Agent takes responsibility, brings decisions back to you, and leaves evidence you can review. Cloud execution lets you begin without connecting a computer.
Choose the first job
Pick a small responsibility with recognizable inputs and an observable finish. A weekly customer-feedback brief is a better trial than “handle customer success.” Give the Agent the feedback to read, the questions to answer, and an example of a useful brief. Keep sending messages to customers outside the assignment until you have reviewed its work.
An existing process gives you something to compare against. Record the time you currently spend and the corrections you normally make. The first trial should tell you whether delegation produces a useful result, rather than merely whether the Agent can run.
Create your workspace
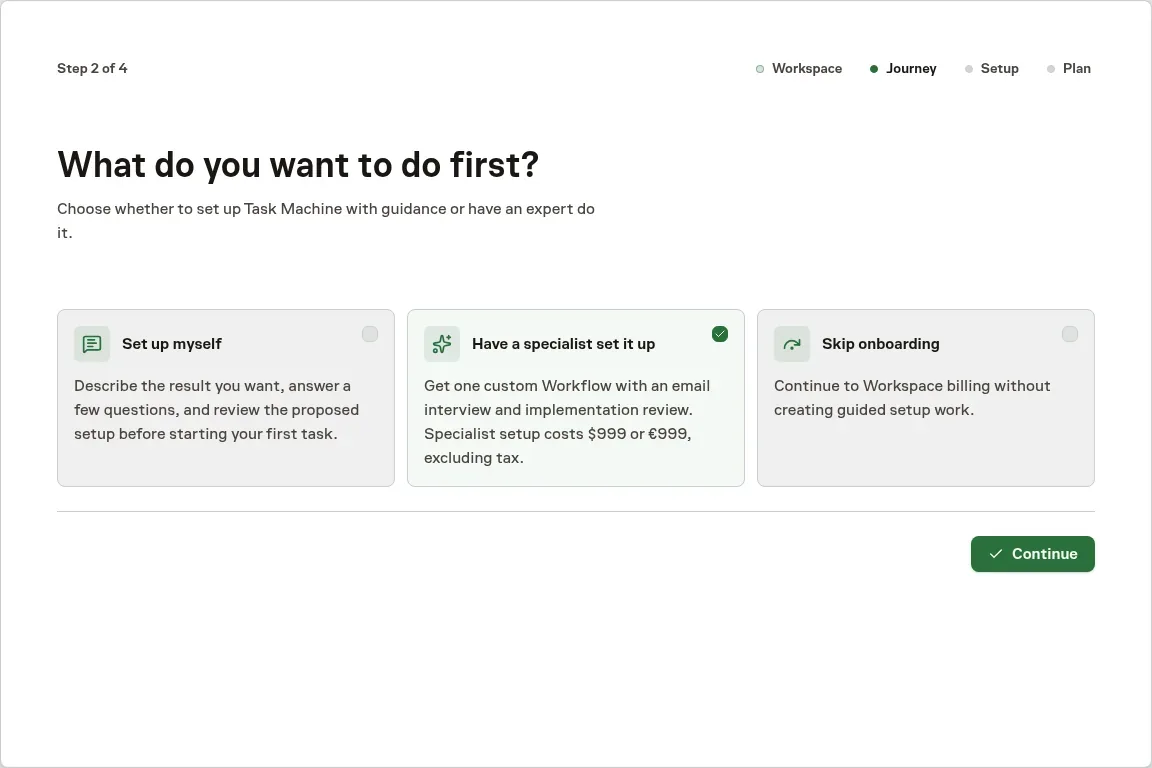
Your first Workspace is created for you and named after you. Rename it any time in Settings, then General. Additional workspaces, created from the account menu, ask for a name first. Choose Set up myself for guided setup or Have a specialist set it up for the separate specialist service. A Playbook selected on the public site carries that starting point into guided setup. You do not need to design a whole organization first.
Choose your starting point
Set up myself
Describe one result you want, then refine it through the guided conversation. You can explain whether the work should repeat as part of that conversation. You do not need to choose between a Task and a Workflow before describing the job.
Expert setup
Expert setup is a separate paid service for one custom Workflow. It costs $999 or €999 excluding tax. Task Machine interviews you about the use case by email, then a specialist reviews the implementation. Workspace access and usage are separate, and the service includes no meetings. This path continues through Plan and email rather than entering the self-service guided conversation below.
If you can manage this Workspace and already belong to another active Workspace that has completed onboarding, Skip onboarding lets you continue to Plan without setting up work.
Describe the result you want
Write the job in ordinary language, or search the examples for a starting point. A Playbook selected on the public site carries that starting point into setup. You do not need to choose a Project or assemble Agents and Workflows first.
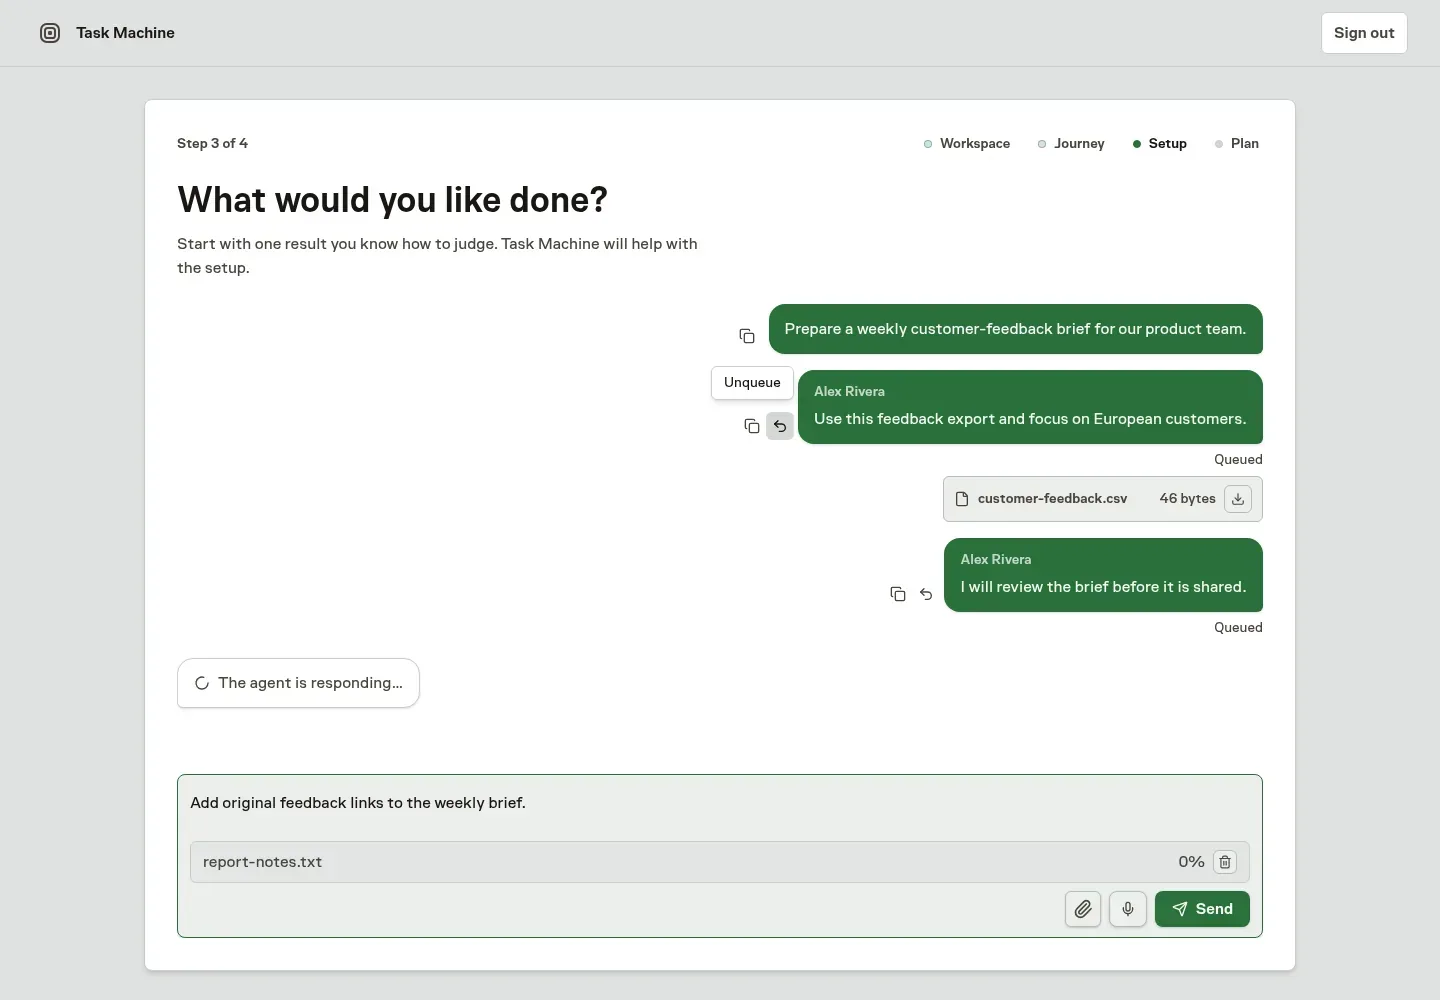
Attach a text brief, a CSV export or a small screenshot using the paperclip, then send it with your message. Files stay with this private Chat for later replies. If setup cannot interpret a PDF, Office or archive file, provide the relevant text or an image when it asks.
You can send more messages and files while setup is working, including corrections such as “Make this a weekly report.” A correction invalidates an older generated plan, so you review the updated version before choosing Start.
If you need to edit an answer before the agent starts receiving it, choose Unqueue beside that message. Its text is placed before anything already in your composer, with both sets of files retained. Other queued answers and the running response stay unchanged. Review the combined draft and choose Send when it is ready.
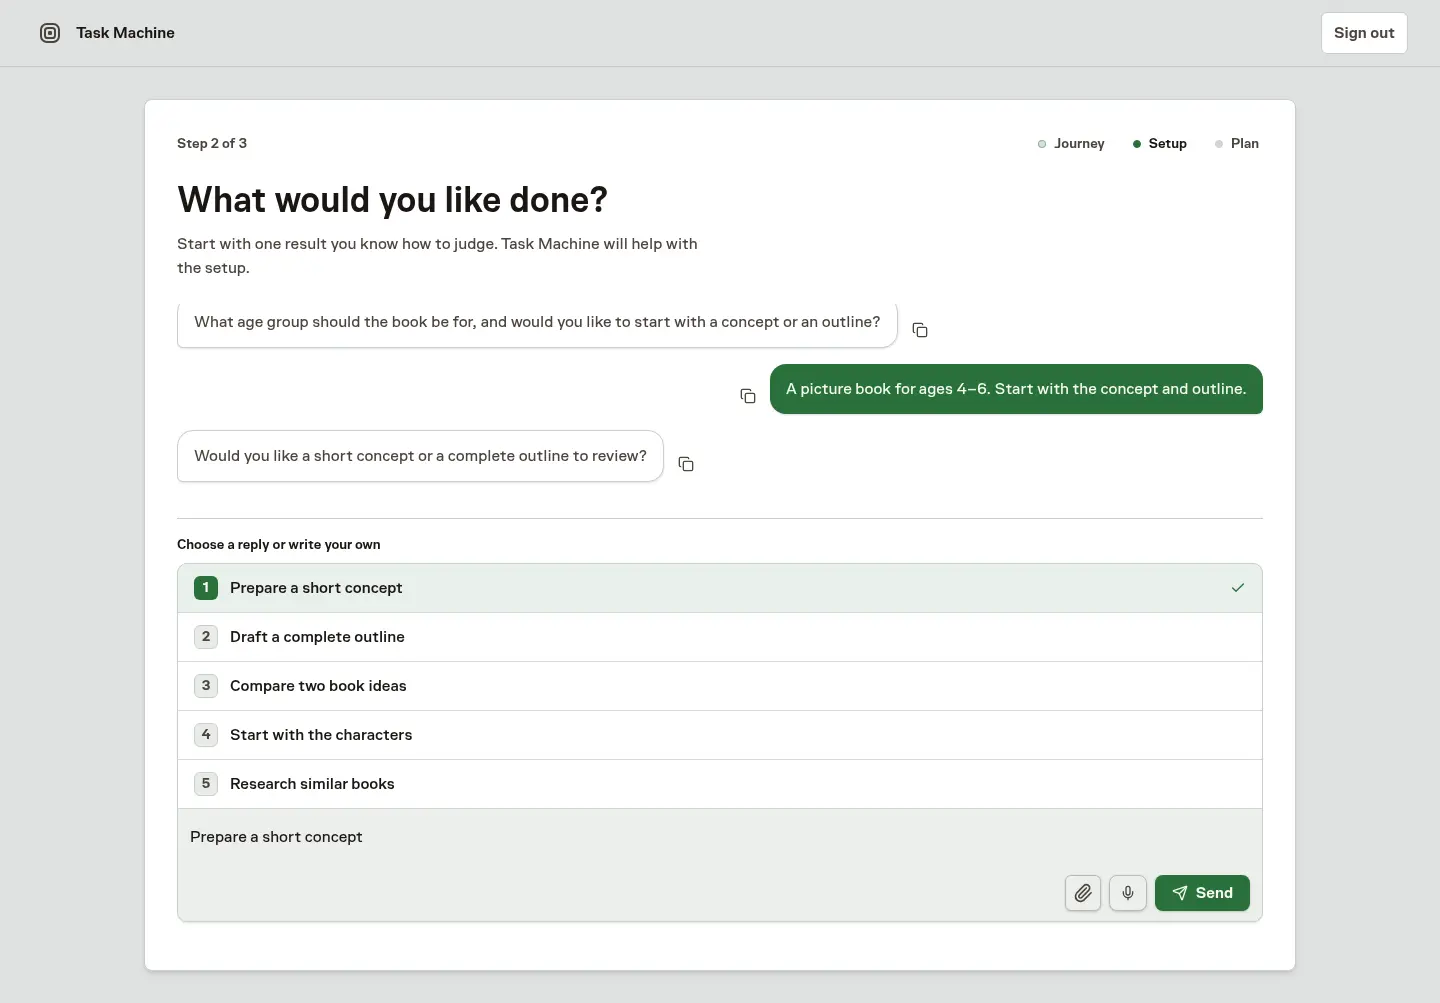
Task Machine asks relevant questions about the result, inputs, access, and review boundaries. Suggested replies fill an editable answer. Change the wording before sending it whenever the suggestion does not fit. Setup stops asking once it has enough information to propose the work.
Your private conversation is saved, so you can leave and return. If a reply fails, choose Retry beside it. Task Machine retries your original message while keeping your previous answers and files. You can also continue by sending another message in the same conversation. Nothing is installed until you choose Start.
Complete access securely
When the job needs a Repository, Connector, or credential, setup explains why and checks what is currently available to you. If none exists, its secure creation form opens directly. Otherwise, choose an existing resource or create another. Resources created earlier in the conversation remain available for later requests.
Never paste passwords or keys into the conversation. Task Machine checks the saved connection before accepting it as ready.
Unfinished access requests stay in the private setup conversation, where you can complete them without leaving setup. Closing a form does not mark its request complete.
Review what will happen
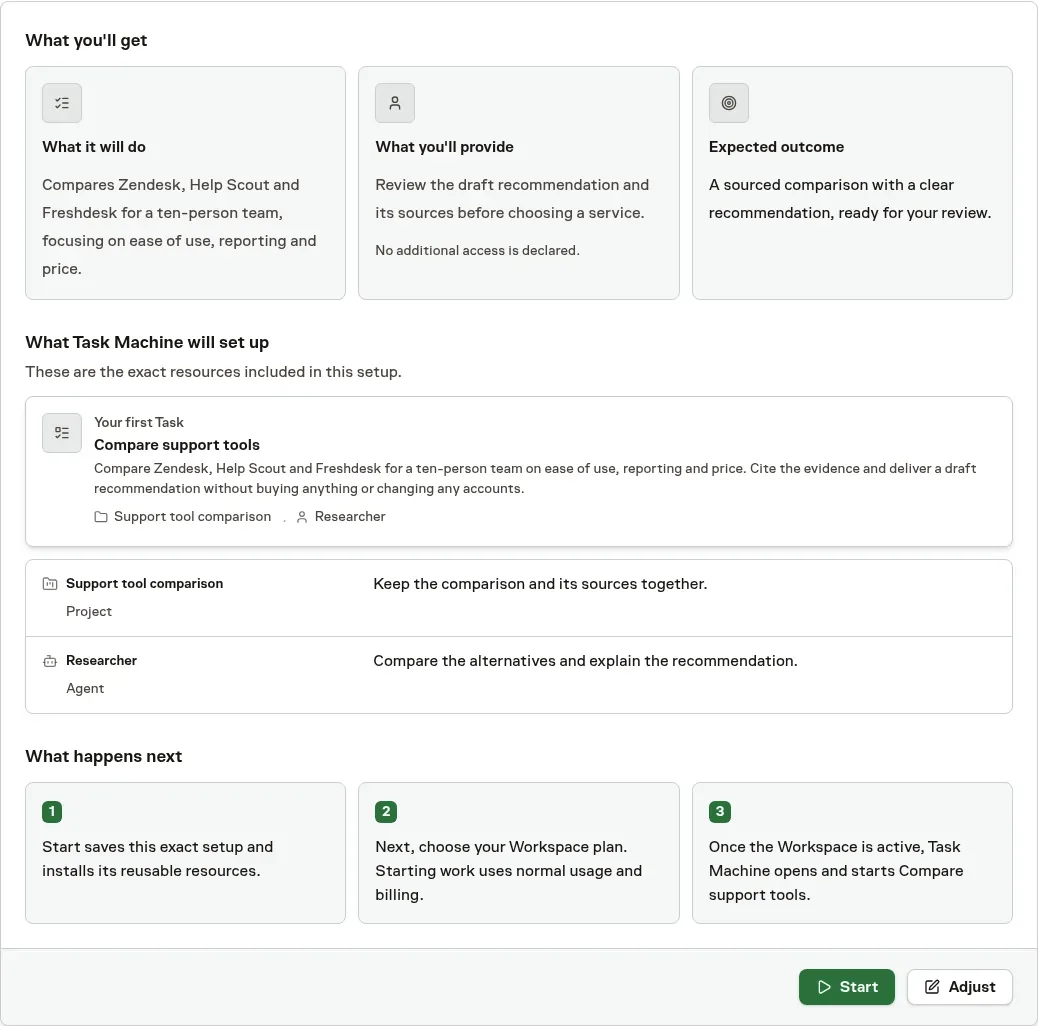
Review the whole Playbook: what it does, what you need to provide, its outcome, the resources it creates or reuses, and the exact first Task. Check access, approval boundaries, and any recurrence before choosing Start to accept that exact version. Choose Adjust to correct it. Real work uses normal Workspace usage after access is active.
For scheduled work, onboarding opens the first scheduled Task. Its agreed timing decides when it can start, so opening the Task does not run it early.
Activate and review
Understand the cost before activating access
Review the Workspace access option and usage allowance before activating it. Cloud execution consumes managed usage. Local execution has separate machine and provider requirements. Billing and usage explains the trial, recurring allowance, additional usage, and Cloud file costs.
Installing a Playbook creates its coordinated setup. Complete any Connector access and schedule-timing decisions that follow in Inbox. Installation alone does not establish that every part is ready to run.
Define a reviewable result
Choose the evidence before seeing the output. For the feedback brief, require links to the source material, distinguish repeated complaints from isolated reports, and ask for uncertainties. A polished summary without those checks is not enough to decide whether the process should repeat.
Follow the first Task without watching every Run
After activation, onboarding opens the actual first Task for one-off, recurring, and catalog work. The Task is the place to inspect the request and give specific direction. Returning from Checkout or retrying activation does not create a second first Task.
If work needs an external service, complete its Connector setup and grant only the access the job needs. Repository work also needs repository access. A missing input or unavailable execution environment may prevent work from starting. Troubleshooting explains how to distinguish these states.
A request can need clarification or a plan review before implementation begins. Read the proposed scope and consequences rather than approving only its title. A review request is not evidence that the requested work has already been performed.
Handle what needs you in Inbox
Open Inbox for questions, approvals, proposals, and problems that need your judgment. Read the context and use the item's resolution controls. An approval authorizes the described action. A question asks for information. Reading or dismissing an item is not the same as approving it.
Use Chat to discuss a broader direction or shape the next job. Use the Task's comments to steer this particular job. You do not need to keep each Task or Run open while waiting. Daily work in Inbox explains how to work through the attention queue.
Review the output before expanding
Check the actual draft, document, change, or other result against the original request. Look at the supporting sources and evidence, not only the agent's summary. The Task preserves the work's history, while its Runs hold execution detail when you need to investigate. An agent or verifier can still make mistakes.
Your first job is complete when you have reviewed a useful result or made a clear decision about why it cannot proceed. If it falls short, give a specific correction. Save reusable guidance in Memories or the appropriate instructions rather than assuming every correction changes future behavior automatically.
Repeat a proven job
Once the result is reliable, use a Playbook or Workflow to make the process repeatable. Add a schedule, review boundaries, and an appropriate budget. Increase the scope of delegation as the evidence supports it.
How Task Machine works explains how the pieces fit together. Where agents fit first helps you choose the next responsibility to delegate. If work needs your computer's tools or files, Connect a Local Worker covers the optional installation path. The Glossary defines the terms these pages use.