Start Here
Onboarding
The guided path from a new account to a workspace with agents ready to work.
Onboarding is the shortest path from a new account to agents doing real work. It is a guided sequence — Workspace, Machine, Project, Goals, Templates, Autonomy — shown as steps across the top of each screen so you always know where you are, and it ends with a workspace that already has a team in place rather than an empty one.
Sign in
Task Machine uses magic-link sign-in: enter your email, click the link, and you land in your workspaces. There is no password to manage. Account settings hold your personal preferences; which workspaces you can open is decided by your memberships. A brand-new account with no workspace goes straight into onboarding to create one.
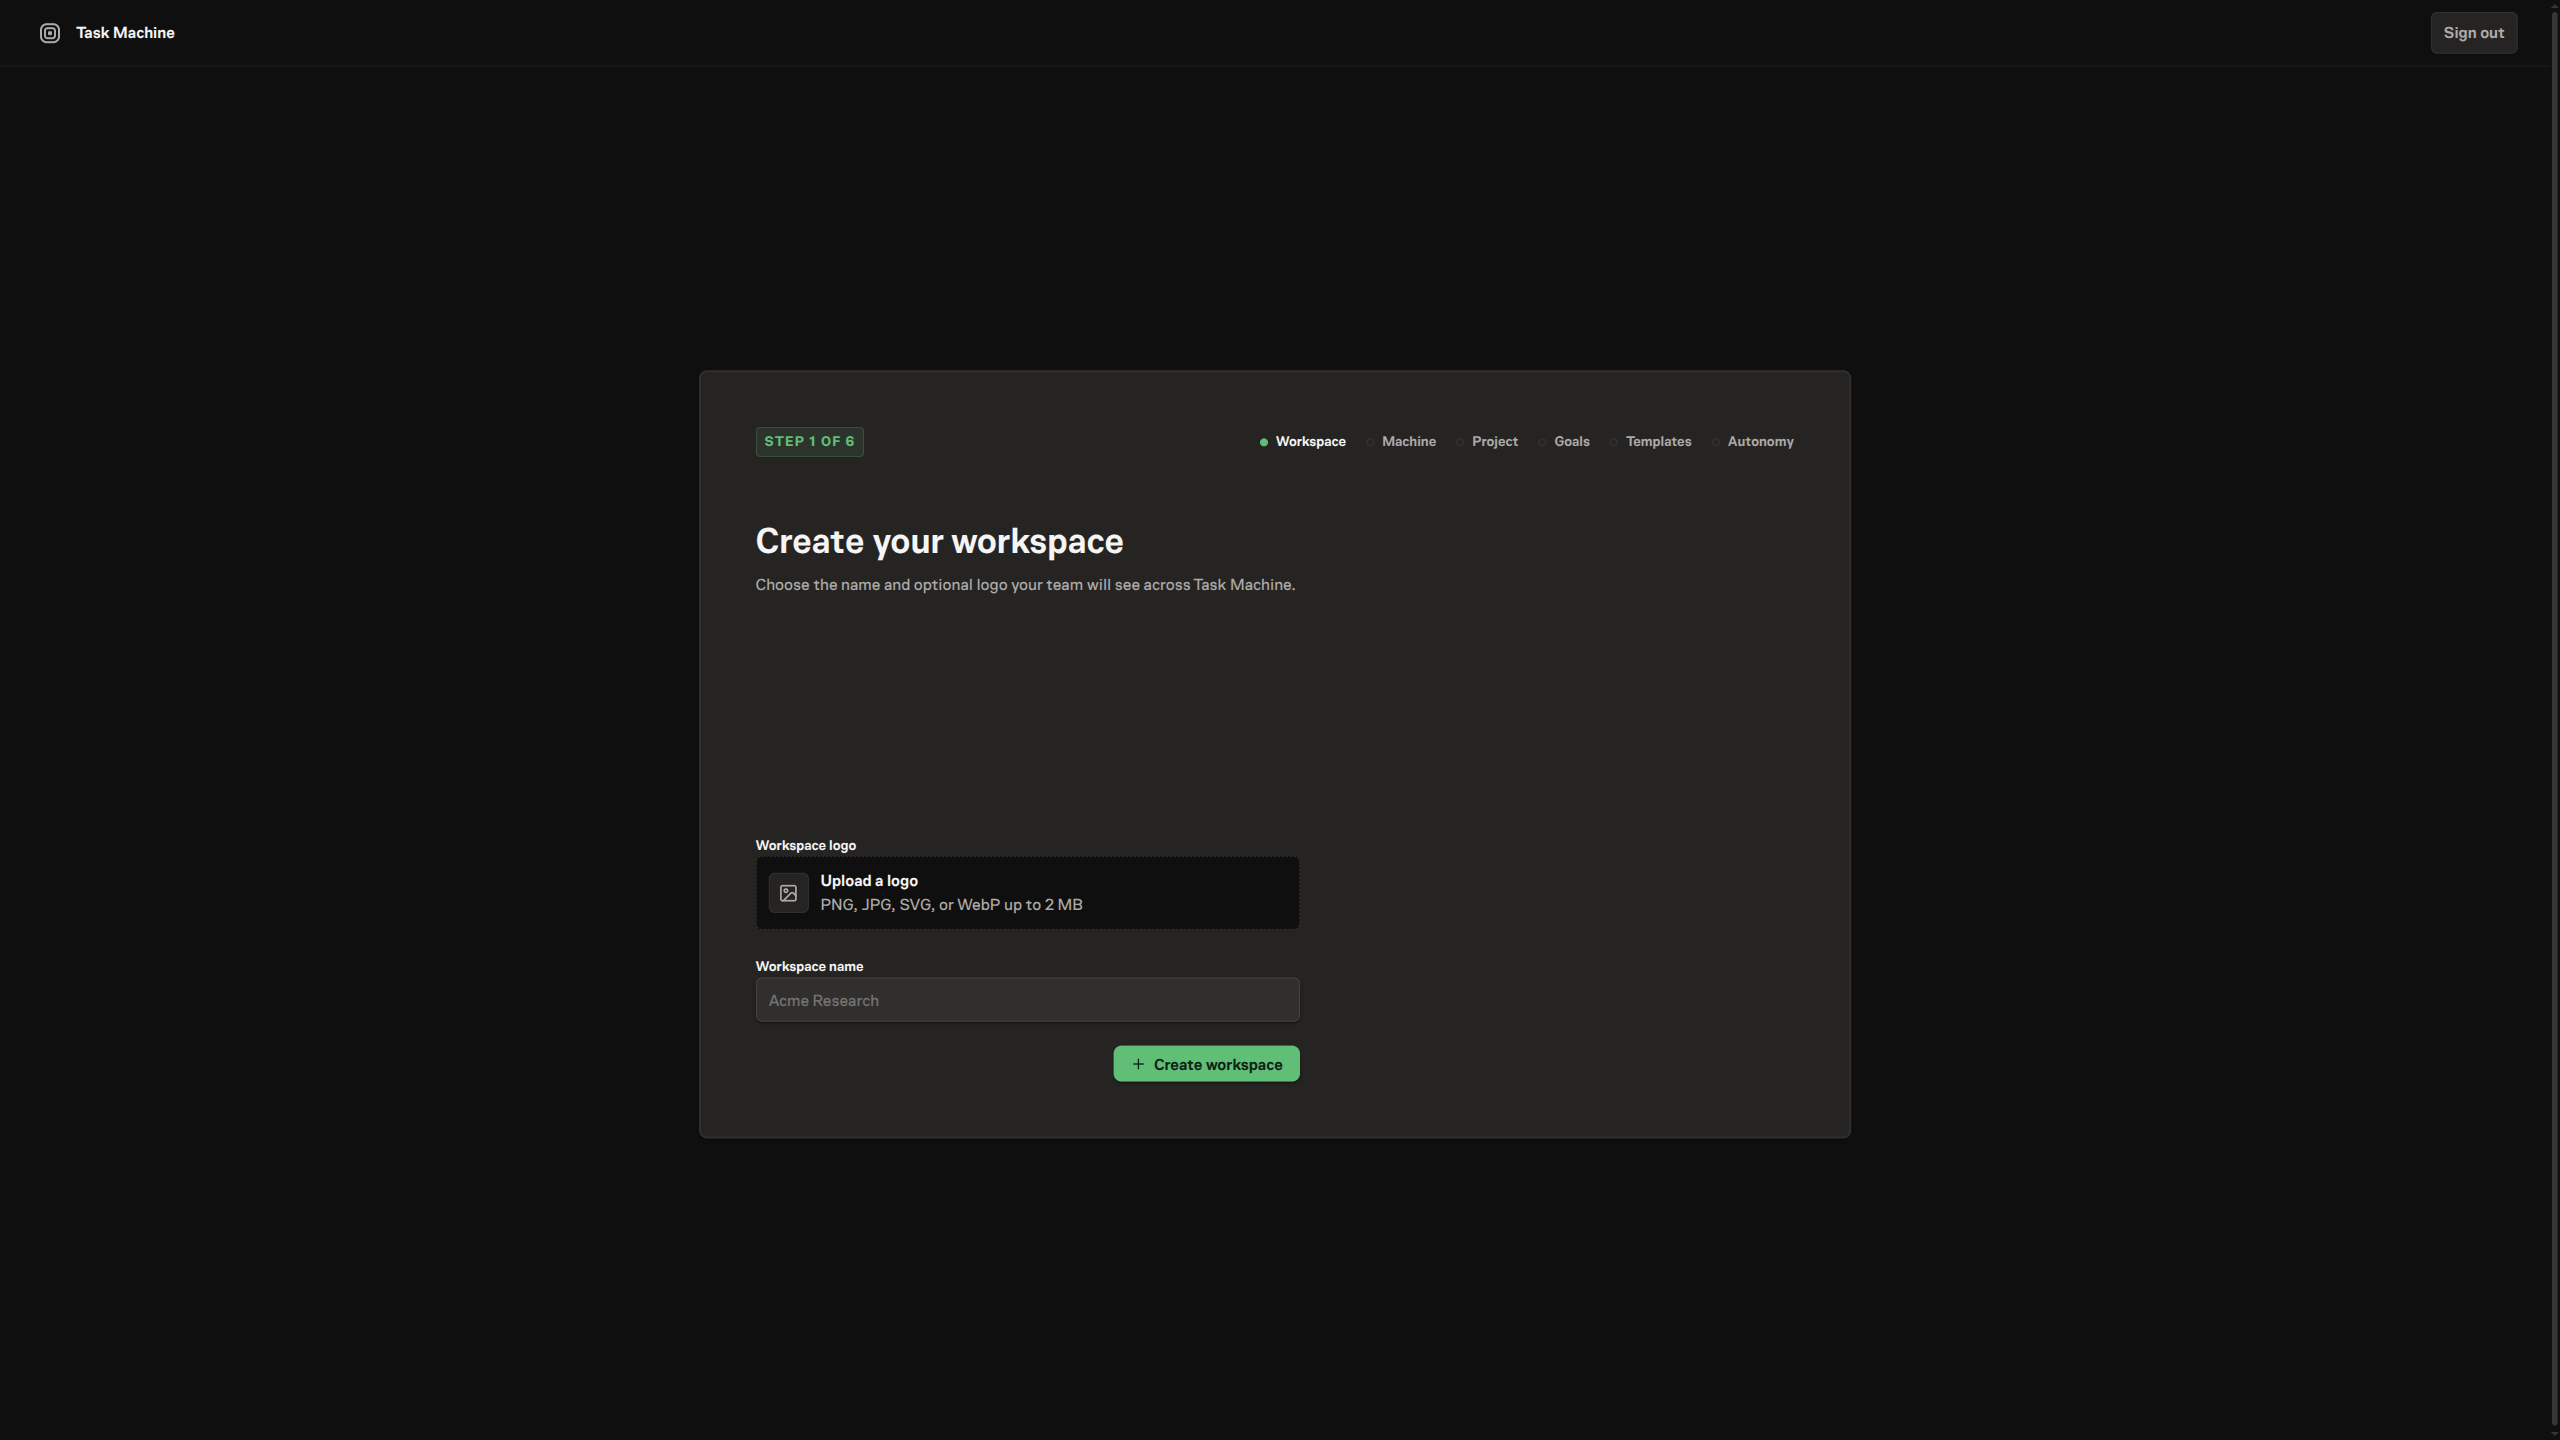
Create your workspace
The first step creates a workspace, and whoever creates it becomes the owner. The owner role carries the access the rest of setup needs — workspace settings, member management, and the permission to connect the first machine. Give the workspace a name that matches the company, client, or context it represents; everything you do next lives inside it.
Connect a machine
Agents run on machines you control, so the next step connects one. Install the tama CLI on a computer that has your coding tools, then run tama setup to authorize it: it shows a device code, you approve that machine in the browser, and from then on the daemon reports to your workspace. Once connected, the daemon detects the coding tools installed on that machine — Claude Code, Codex, Opencode, and the others — and reports its name, version, and which tools it found. The step confirms the machine is online live, so you know the connection worked before moving on.
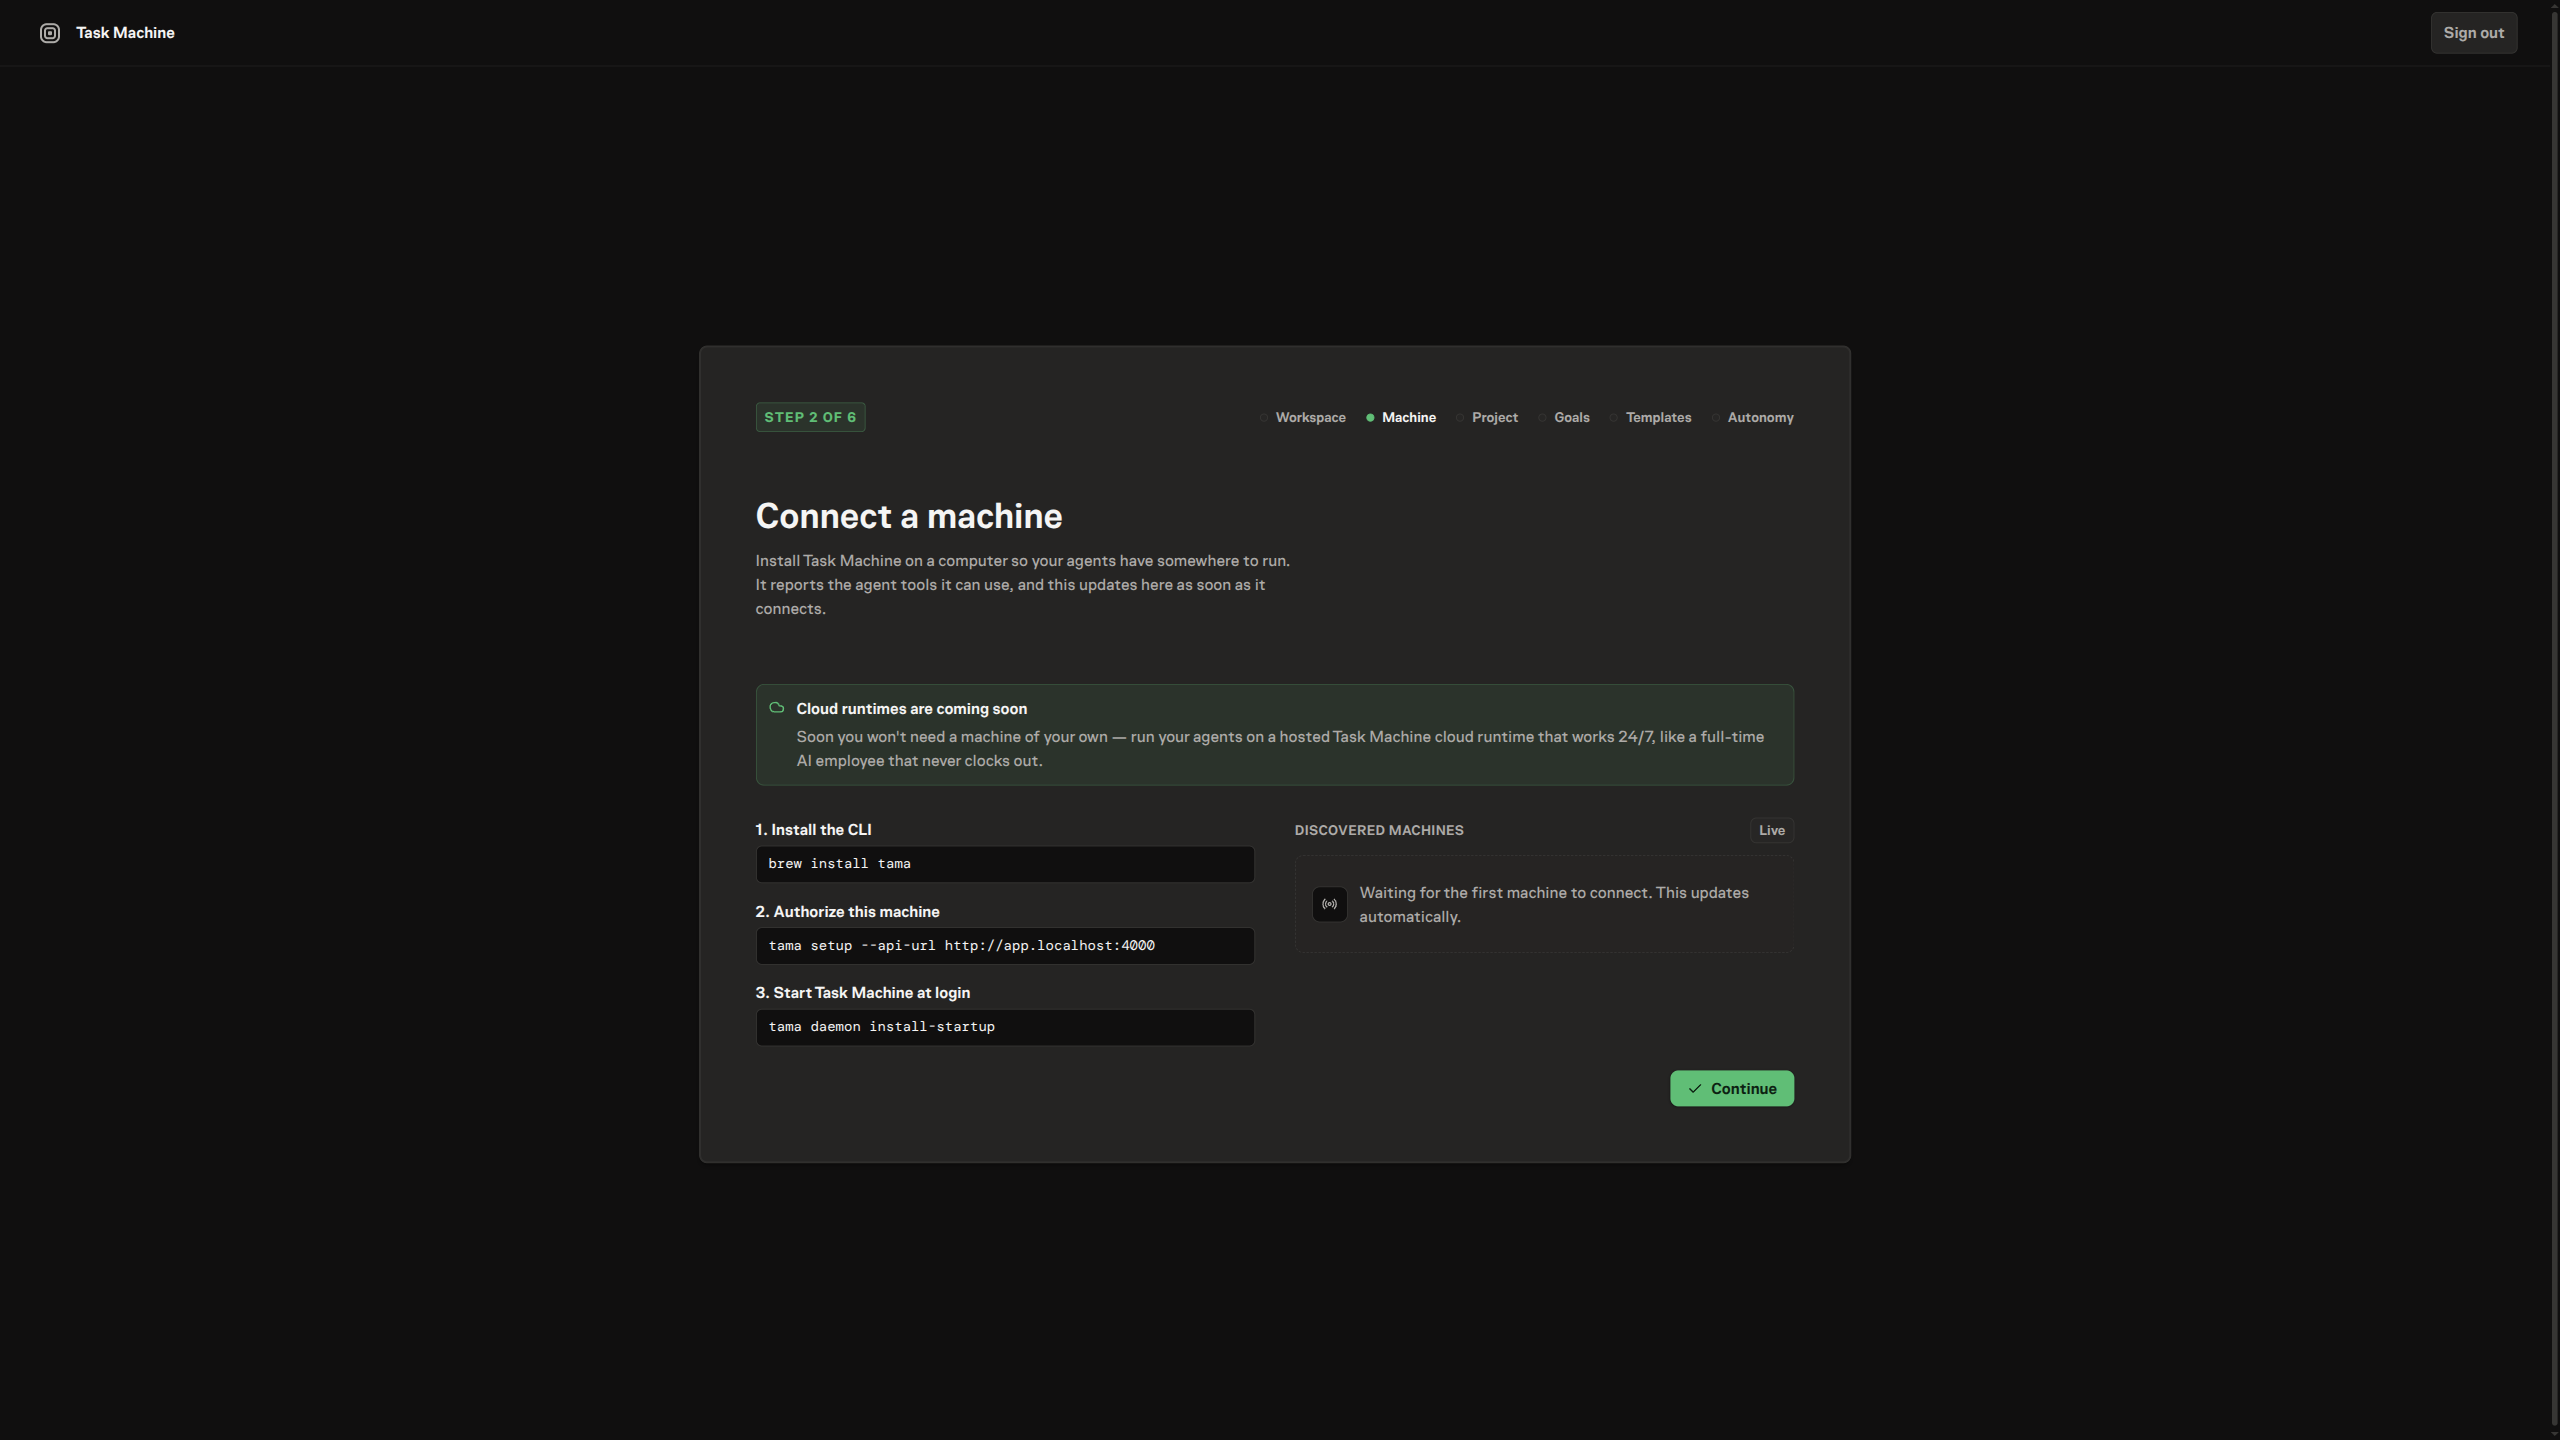
Connecting a machine is required to continue — nothing runs until one reports in, so Continue stays disabled until the daemon comes online, with the live panel showing it waiting. Install the CLI covers installation in detail.
Name a project and your goal
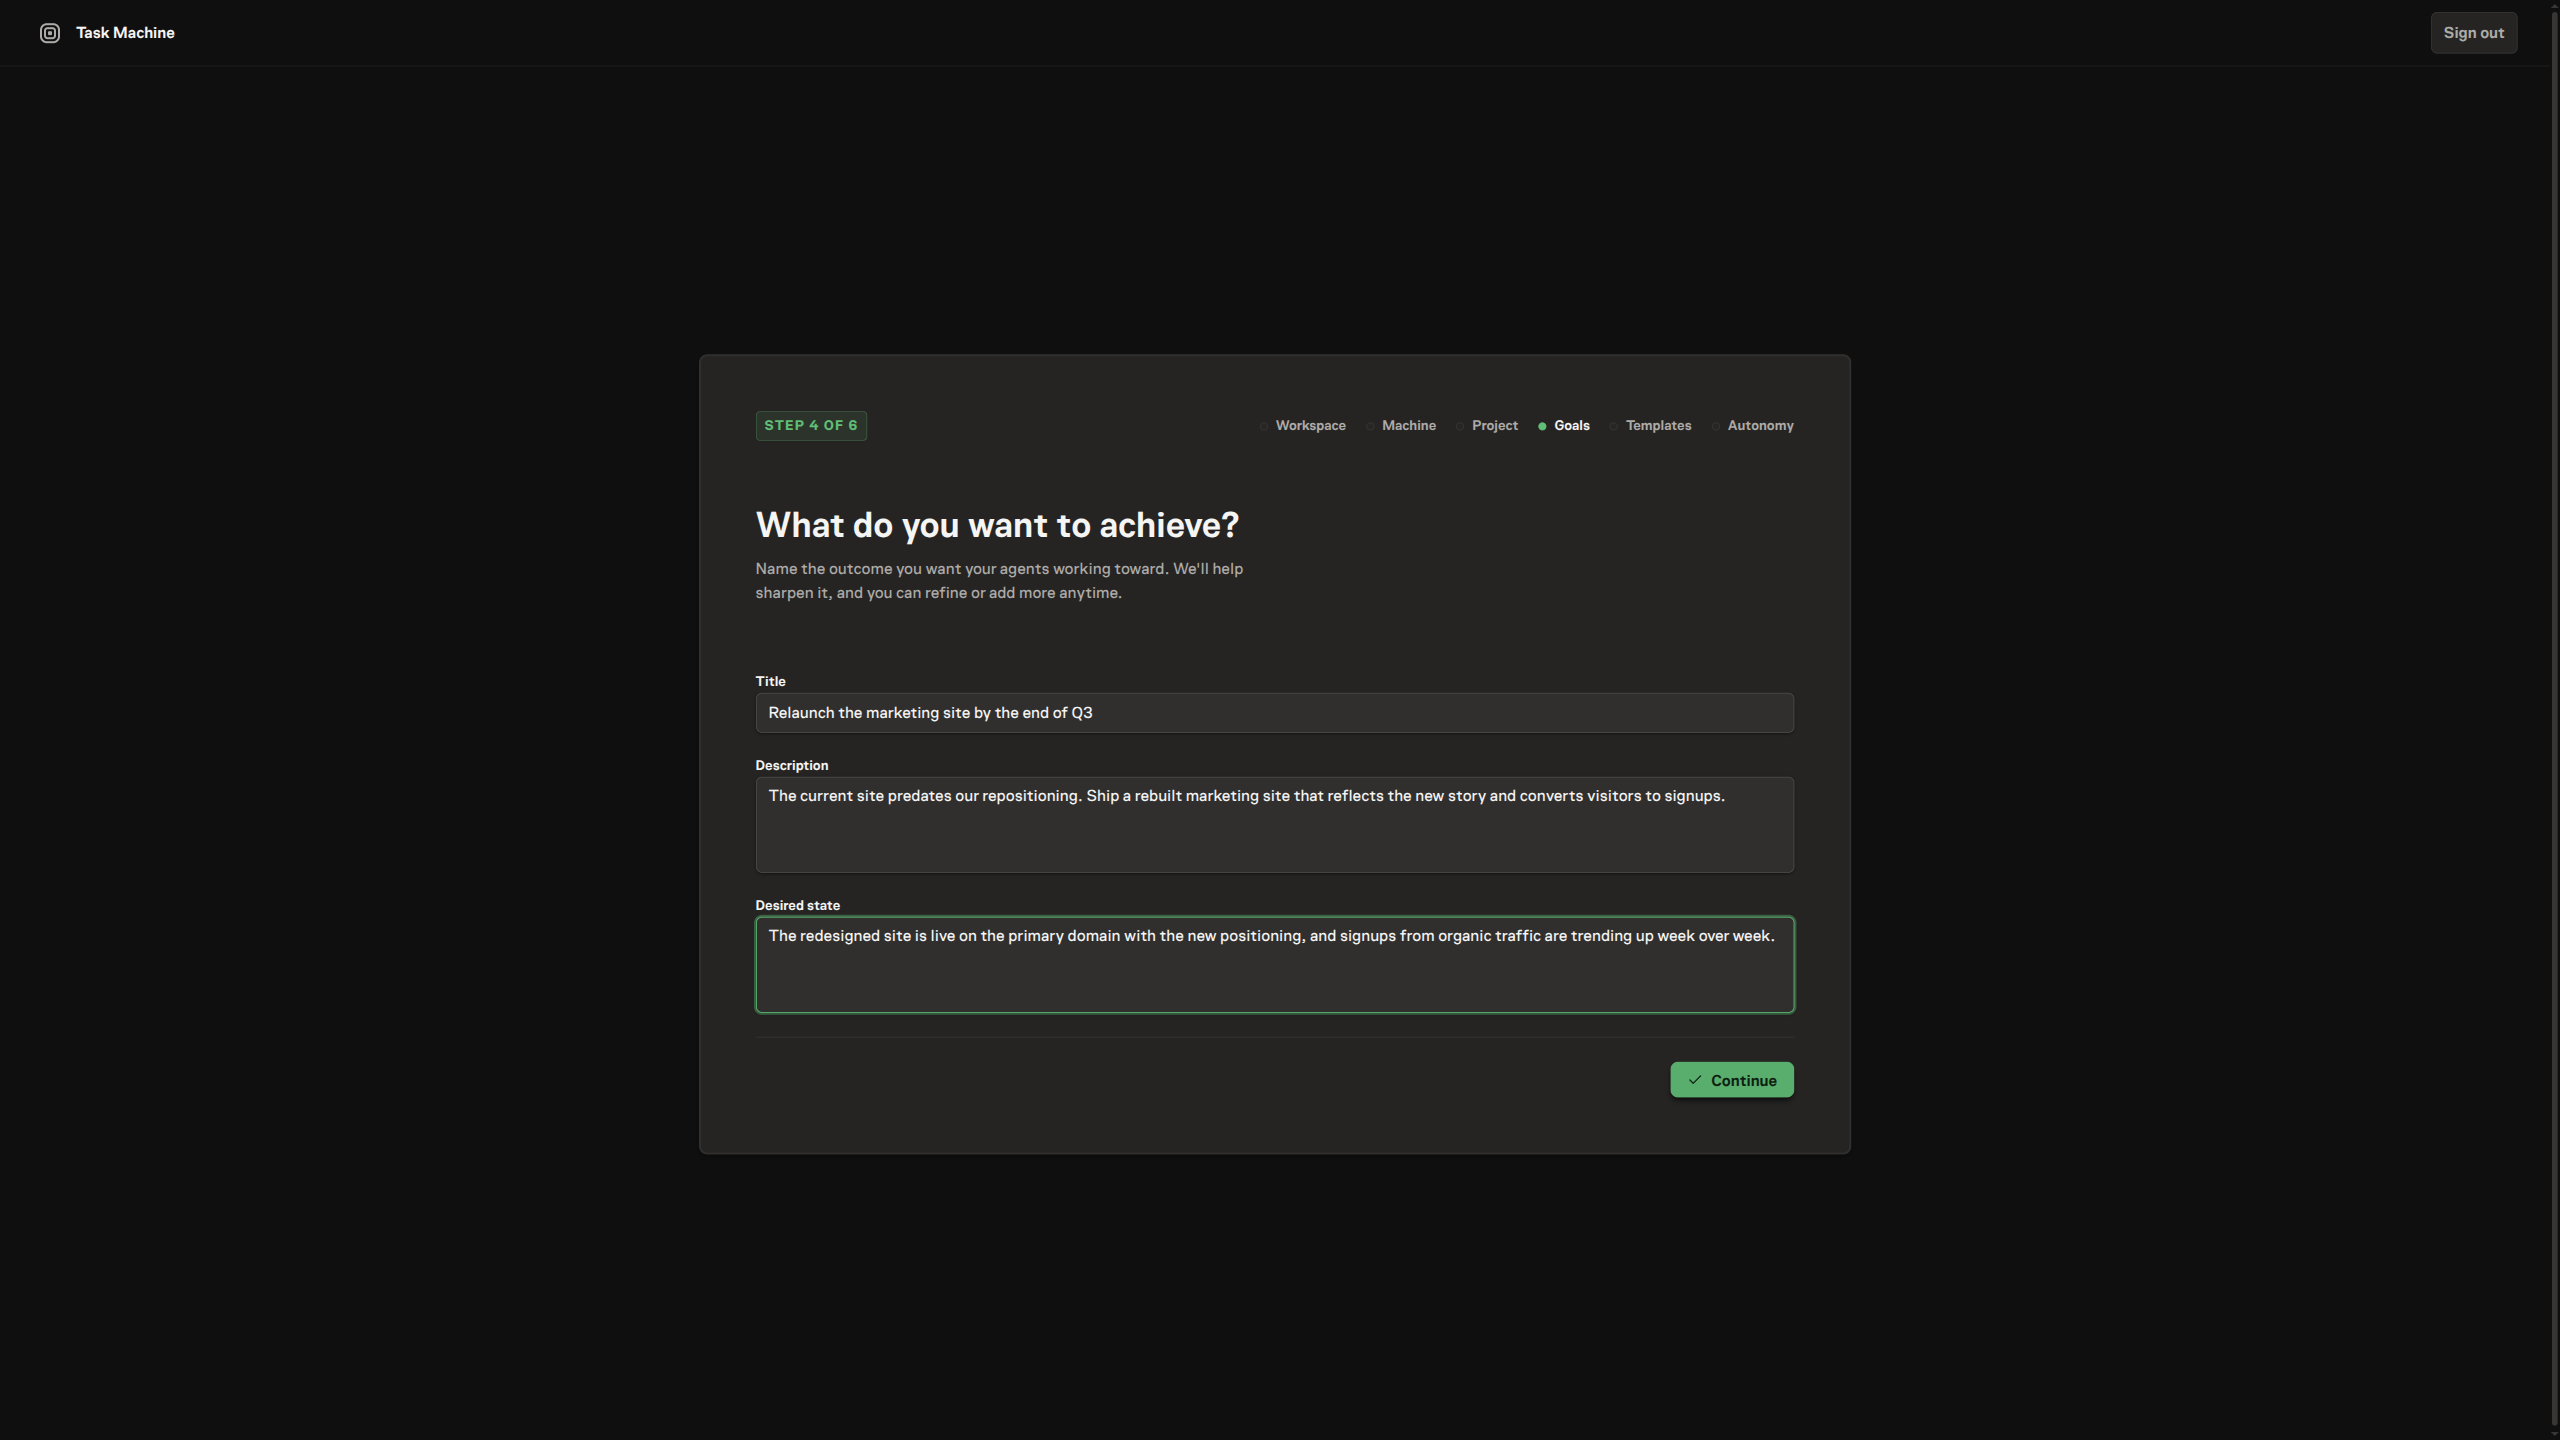
The next two steps frame what the workspace is for. Project creates the first project to hold work, since tasks live inside projects. Goals asks the plain question — what do you want to achieve? — and captures one goal your agents will work toward, with a title, a short description, and the desired state that defines done. When you continue, assistive coaching reviews the goal and, if it is thin, offers a sharper version you can edit and apply or move past; a strong goal continues without a detour. Neither step is skippable — you create the project and name a goal before moving on — and you can refine the goal or add more later, but naming a good one here sharpens what the next step sets up for you.
Install a template
This is where the workspace gets its first working agents. Rather than configuring an agent from scratch, you set up a template — a ready-made bundle of the agents, workflow, and goal that do one recurring job. Browse the gallery and install one, or design one from your goal: describe what you want in a sentence and Task Machine drafts a fitting template for you, which you review and install. Either way the install creates the agents that do the work, so you leave onboarding with a team in place. Installing at least one template is required to continue — Continue stays disabled until your workspace has its first agents.
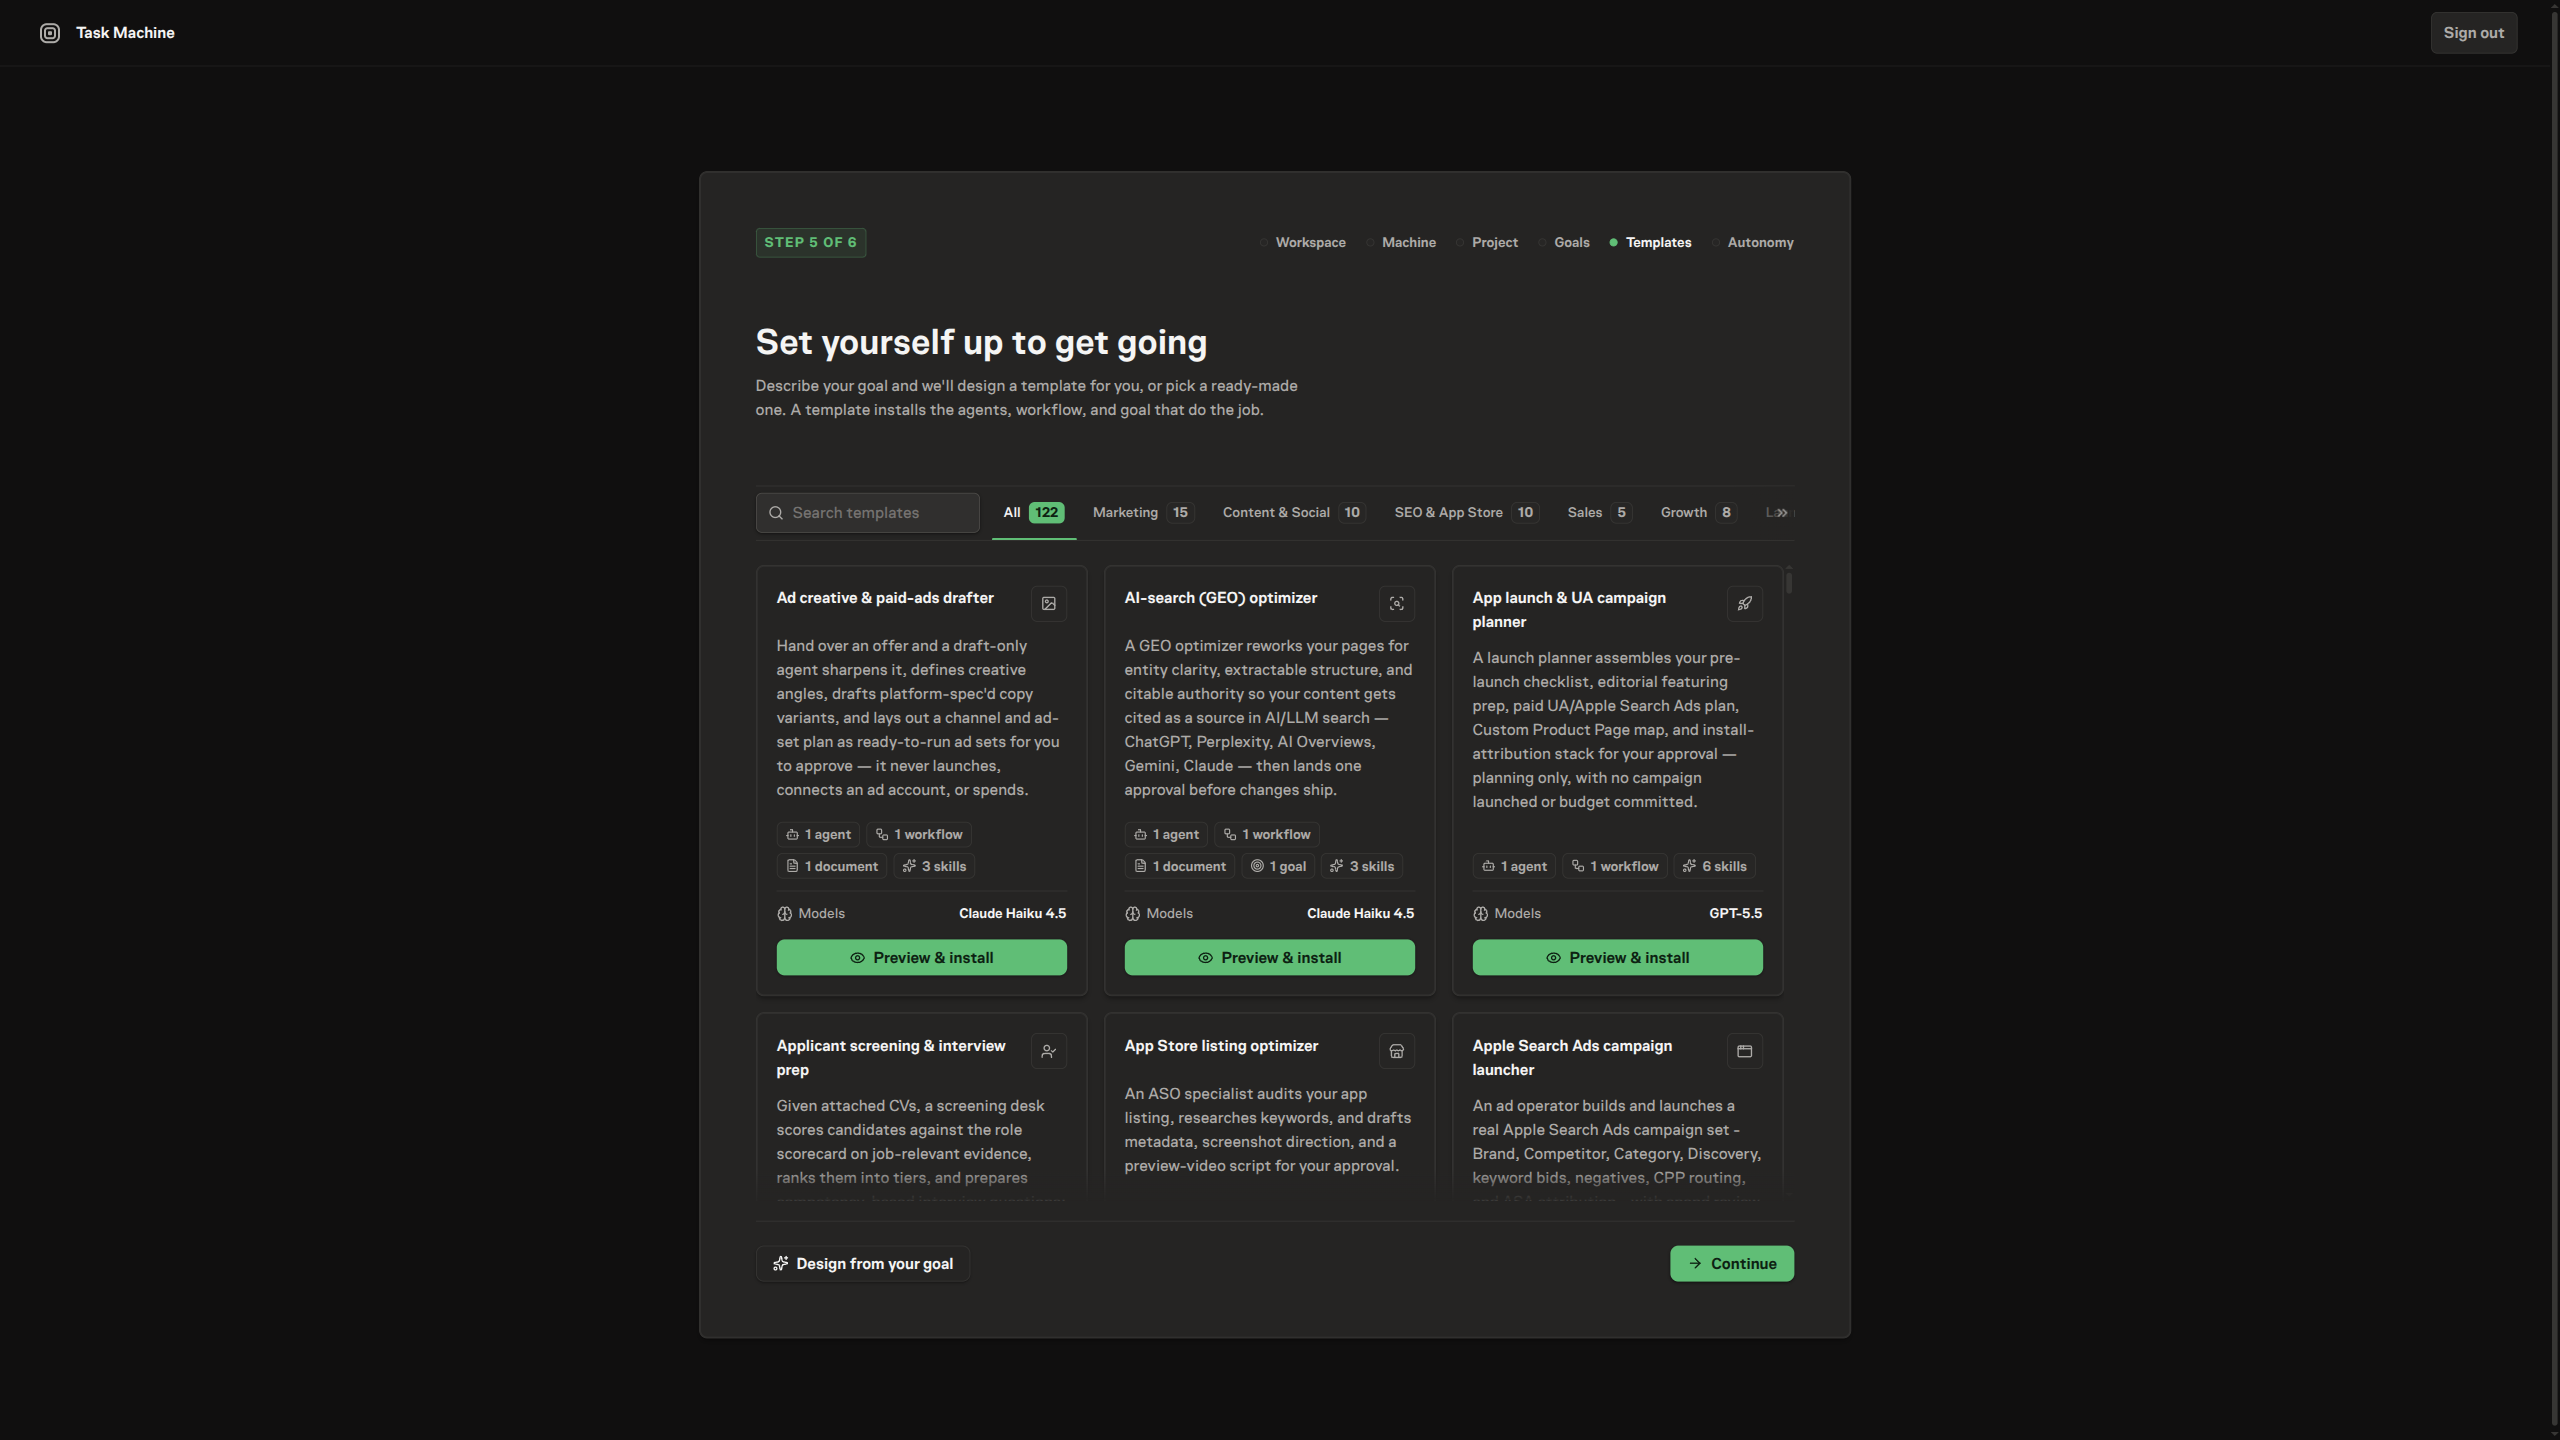
The templates guide covers the gallery, the config each bundle asks for, and custom design in depth.
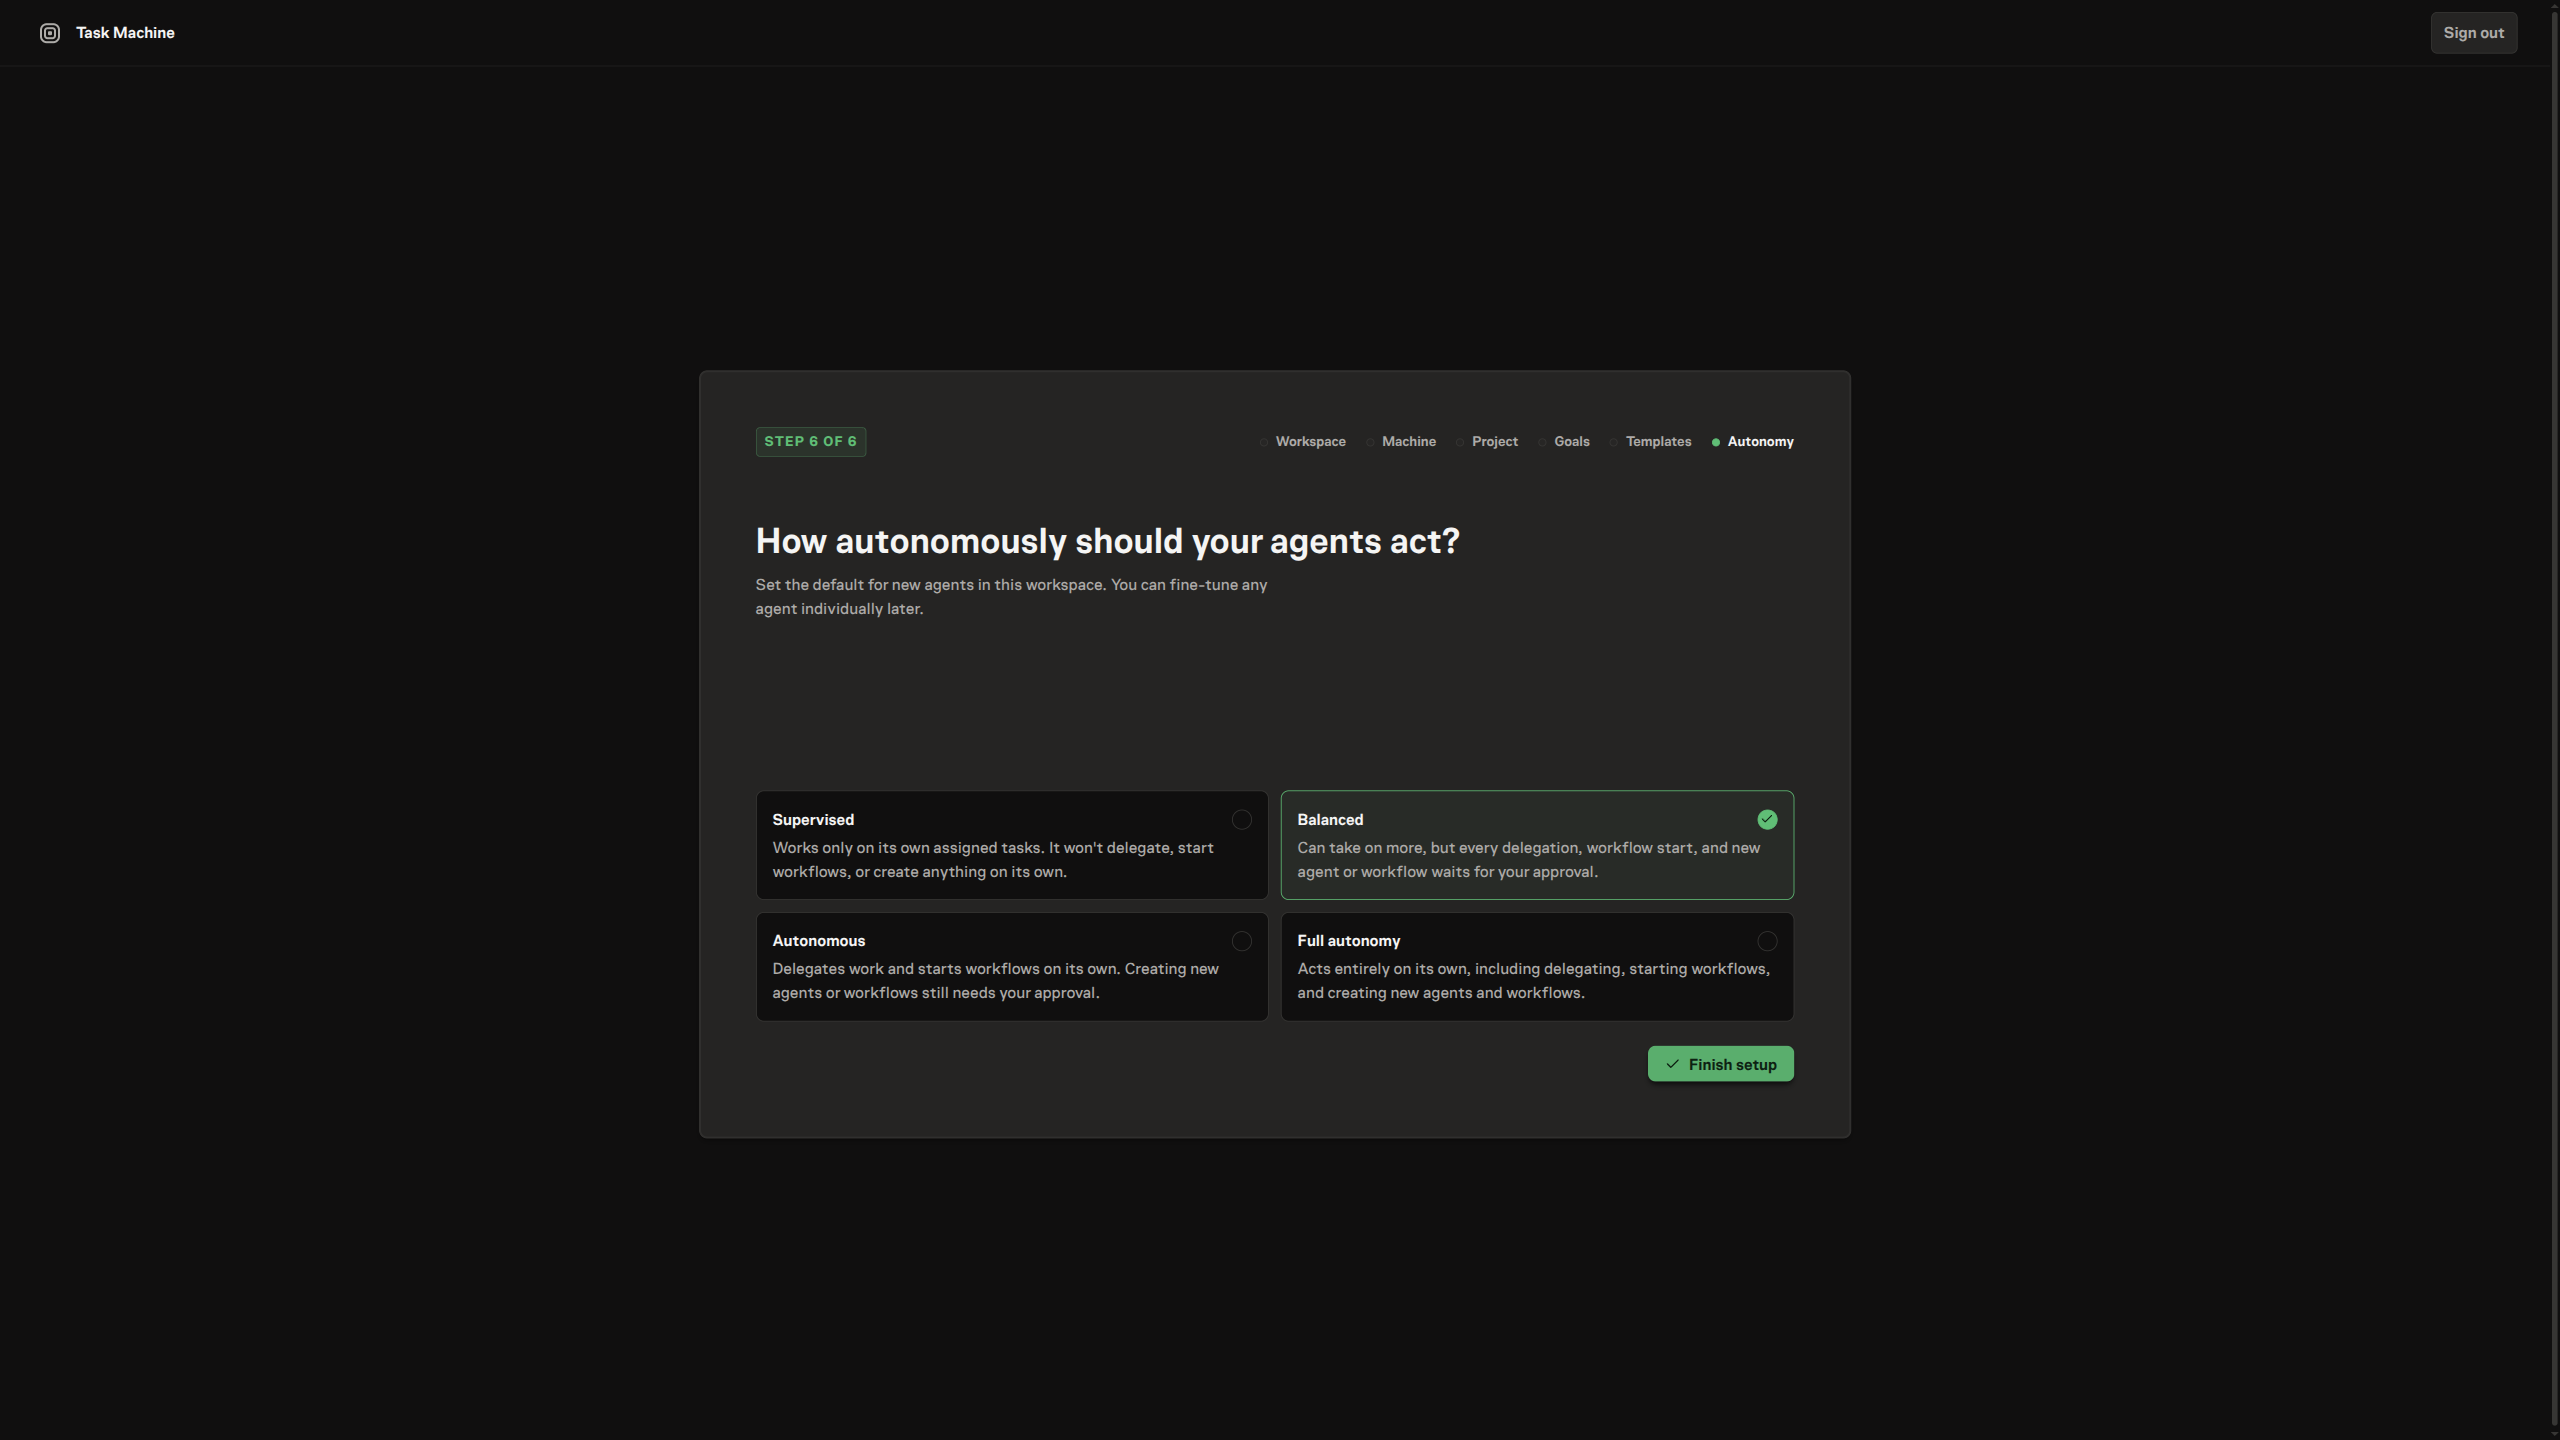
Choose an autonomy level
The final step asks how autonomously your agents should act — from proposing everything for your approval to acting on their own — as a small set of named levels. Your choice becomes the workspace default and is applied to the agents the template just installed, so you decide up front how much runs without you. You can fine-tune any agent individually later from its profile.
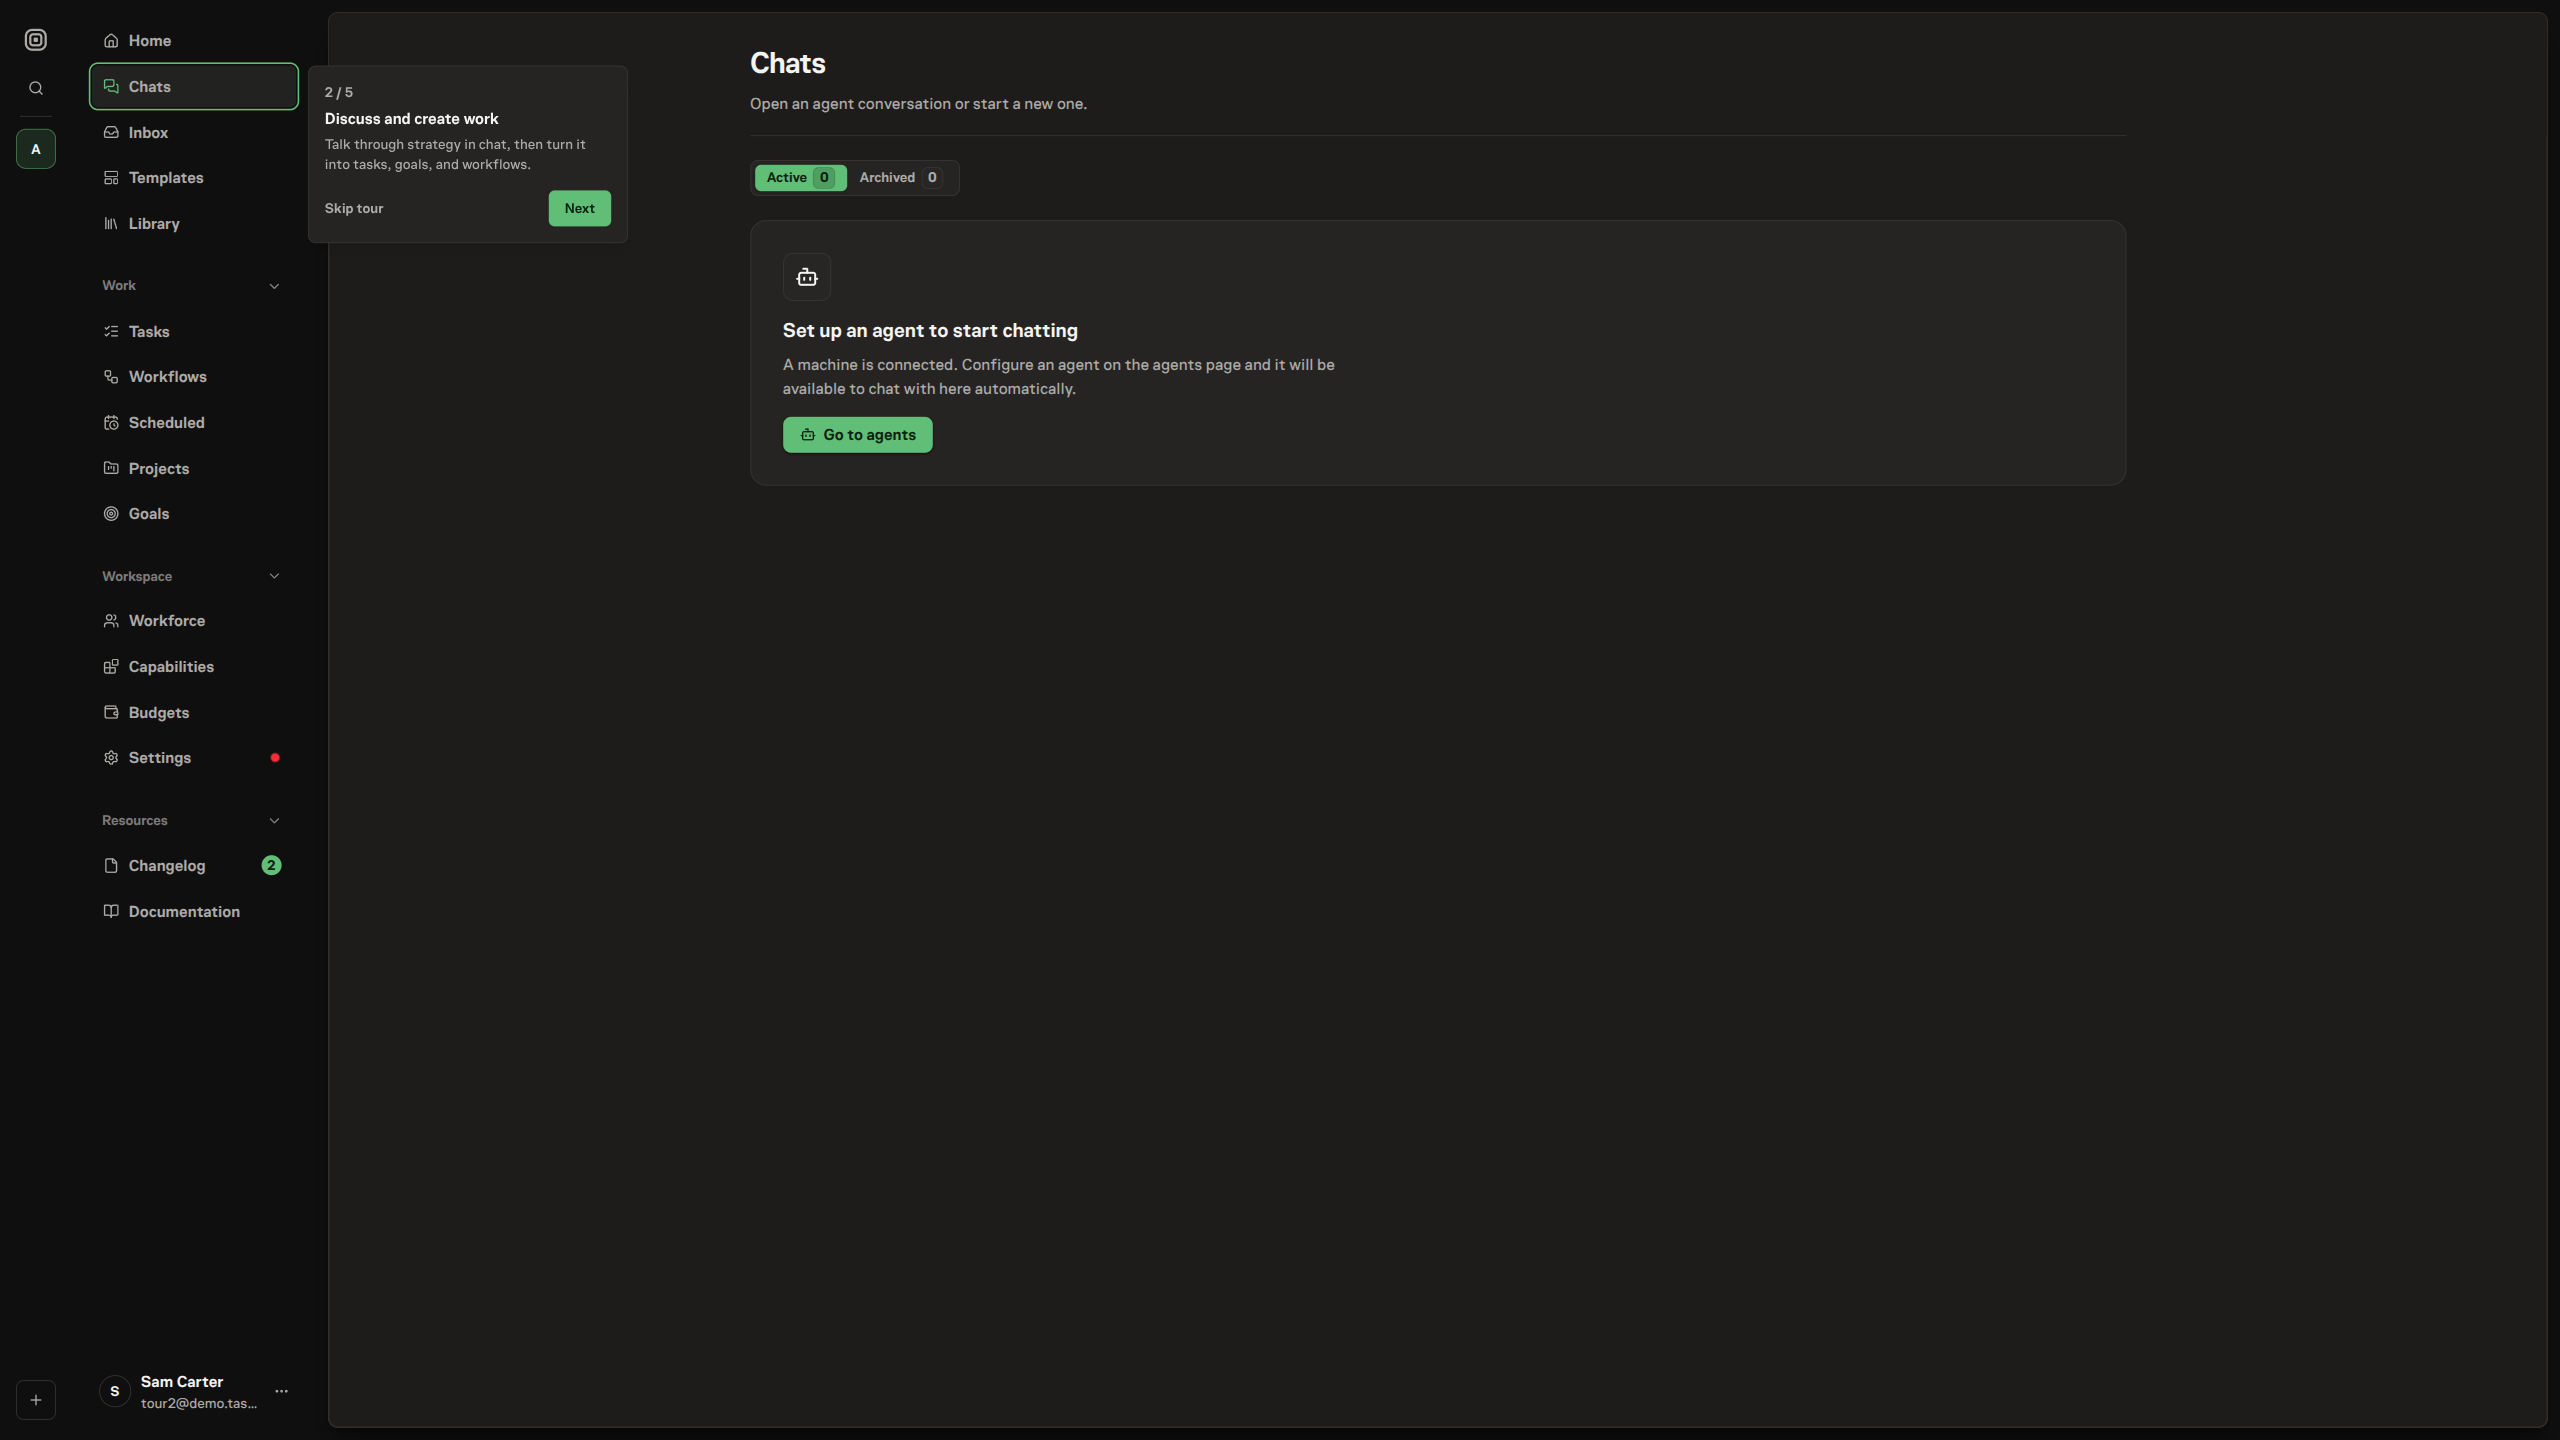
Land in your first conversation
Finishing onboarding does not drop you on an empty home — it lands you in a real conversation. Every workspace gets a built-in Strategy agent, and once your goals are set it opens a chat and speaks first: a short message that reflects your goal back, suggests a concrete place to start, and asks what it needs to turn that into your first piece of work. Strategy is an ordinary agent you can edit or remove like any other; it just comes ready to help you begin. Reply, and the real agent picks up the thread on your connected machine.
A short guided tour gets you there. It points out the three surfaces you will live in — Discuss, Inbox, and Tasks — one stop at a time, then finishes by walking you into that seeded chat, so your first move is a conversation rather than a blank screen. The tour runs once per account; you can dismiss it whenever you like and still land in the chat.
Put a task through the loop
With a workspace, a machine, a project, and a template's agents in place, you have a complete loop. Create a task, assign it to one of your agents, and watch the work happen: the agent picks it up on your connected machine, posts progress and a final summary to the task timeline, and routes anything needing your judgment — a question, an approval — to your inbox. That first round trip is the whole product in miniature.
From here
Now that the loop works, learn the model behind it in How Task Machine works, then settle into the three surfaces the tour introduced and you will actually live in: Discuss to decide, Inbox to approve, and Tasks to steer.